
A little Hexzzle practice
What happens next?
Five small boards. Two choices each. Start with the basics, then try mixed quads and space planning.
No timer or score to chase. Just a better feel for your next move.
1 / Placement
Check the whole piece
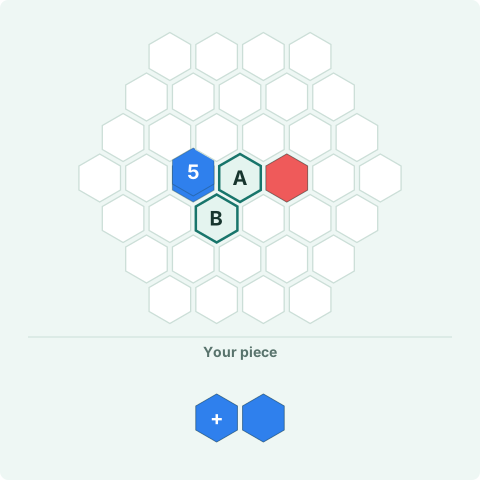
Which move lets this blue duo Bloom?
The + blue tile is the first tile of the duo. Put it at A or B; the other blue tile goes one cell to the right. A is beside the blue 5, but there is also a red tile nearby.
Start at A
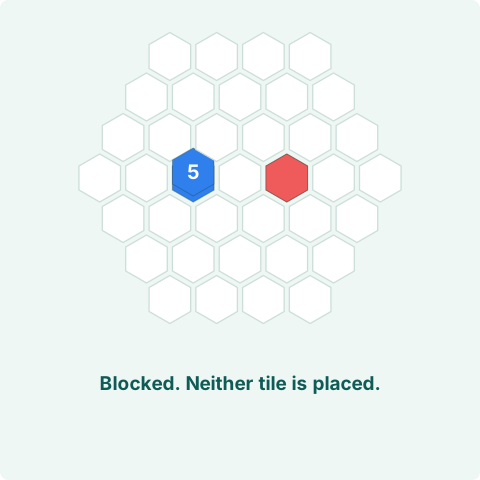
No placement
The red tile blocks the second blue tile.
The first blue tile would fit, but the second lands on red. The whole piece must fit before any gathering happens. Nothing is placed and the blue 5 stays unchanged.
- Blooms
- 0
- Open cells
- 35 / 37
Start at B
Legal placement
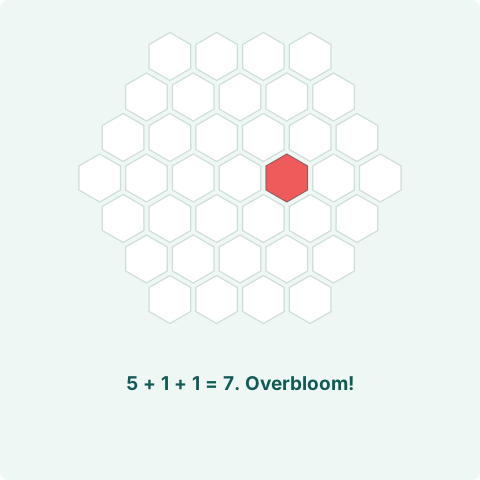
Both fit. The blue stack reaches 7.
Both blue tiles land on empty cells and connect to the blue 5. They gather to 7, then Bloom. The red tile stays. Seven is an Overbloom, so it also earns an extra bonus in Classic.
- Blooms
- 1
- Open cells
- 36 / 37
Check every tile of a piece, not just the one beside a promising stack.
More about fitting the whole shape →2 / Mixed colors
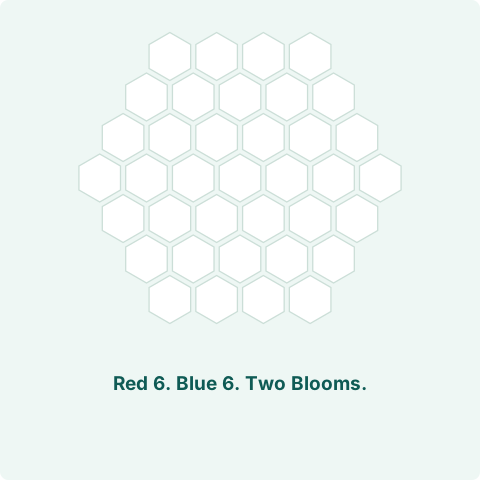
One piece, two Blooms
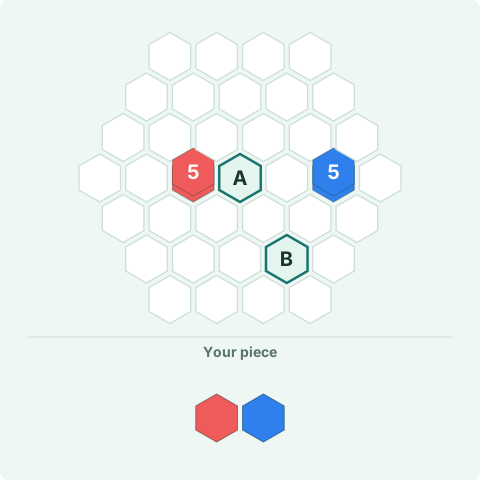
Can this mixed duo finish both stacks?
There is a red 5 on the left and a blue 5 on the right. The duo has red on the left and blue on the right. Start its red tile at A or B, keeping that orientation.
Start at A
Legal placement
Two colors, two separate totals of 6.
Red joins the red 5, while blue joins the blue 5. Each color gathers separately to 6 and Blooms from its own target. The whole board is empty afterward.
- Blooms
- 2
- Open cells
- 37 / 37
Start at B
Legal placement
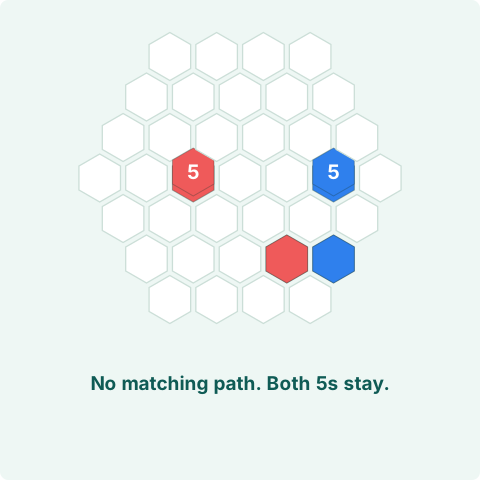
A legal move, but neither 5 is connected.
The new red and blue tiles are too far from their matching stacks. They stay as separate singles. A mixed piece can finish two stacks, but each color needs its own touching path.
- Blooms
- 0
- Open cells
- 33 / 37
A mixed-color piece is not wasted: look at what each of its colors can reach.
Predict where each color gathers →3 / Space
Make room before six
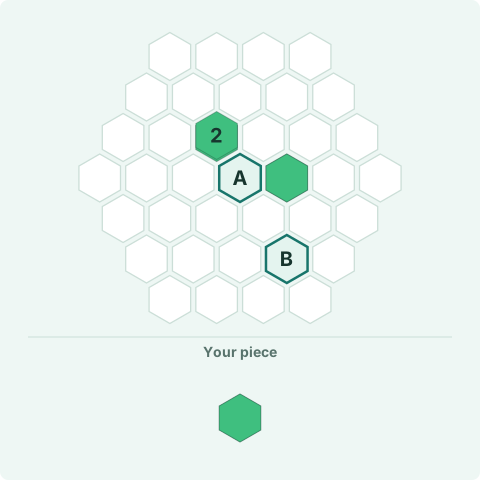
Which move opens space without a Bloom?
A green 2 and a green single are not touching. A touches both; B is farther away. Your piece is one green tile. Compare how much space remains after gathering.
Place at A
Legal placement
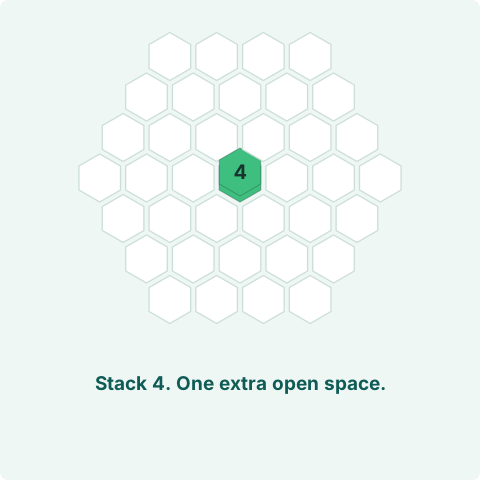
A stack of 4, and more room than before.
The counts add to 2 + 1 + 1 = 4. The new stack stays at A, and both old cells empty. There is one more open cell than before the move, even though no Bloom happened.
- Blooms
- 0
- Open cells
- 36 / 37
Place at B
Legal placement
Three separate green stacks remain.
The new tile touches neither green stack, so it stays as a single. You now have three occupied cells instead of two. Matching colors only gather through an unbroken touching path.
- Blooms
- 0
- Open cells
- 34 / 37
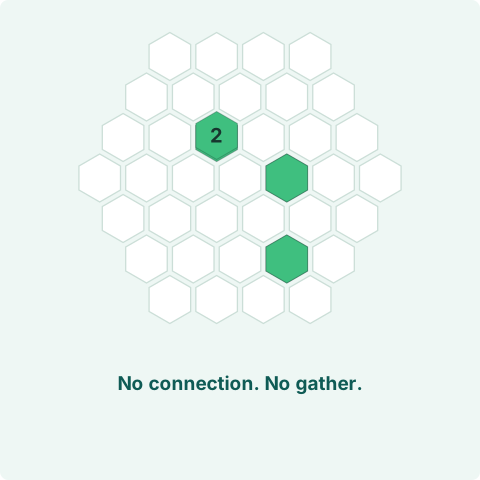
A below-6 merge can be a useful space-making move, not a failed Bloom.
Look for a shared empty neighbor →4 / Quad pieces
Two pairs, two destinations
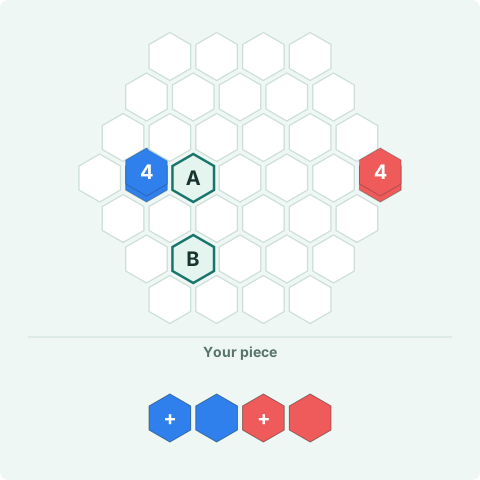
Where can this quad make two Blooms?
The straight quad is blue-blue-red-red, from left to right. Start its leftmost blue tile at A or B without rotating it. Each color has its own + gather point. There is a blue 4 on the left and a red 4 on the right.
Start at A
Legal placement
Each pair finishes its own 4.
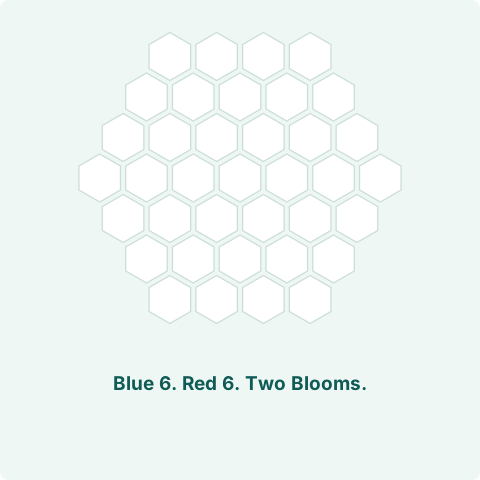
Blue adds 4 + 1 + 1 and red adds 4 + 1 + 1. Each color gathers to its own +, reaches 6, then Blooms. All 37 cells are open. Four tiles in a piece do not form one mixed-color stack.
- Blooms
- 2
- Open cells
- 37 / 37
Start at B
Legal placement
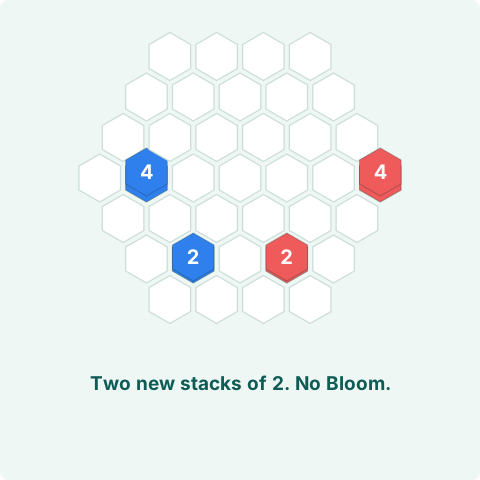
Two new stacks of 2; both old 4s remain.
The whole quad fits, but neither pair touches its matching 4. Blue gathers to 2 at the first blue +; red gathers to 2 at the first red +. Four cells remain occupied: the two old 4s and the two new 2s.
- Blooms
- 0
- Open cells
- 33 / 37
A mixed quad can do two useful jobs. Check the full shape, then follow each color to its own +.
Read each color's stack point →5 / Space or score
A Bloom or more breathing room?
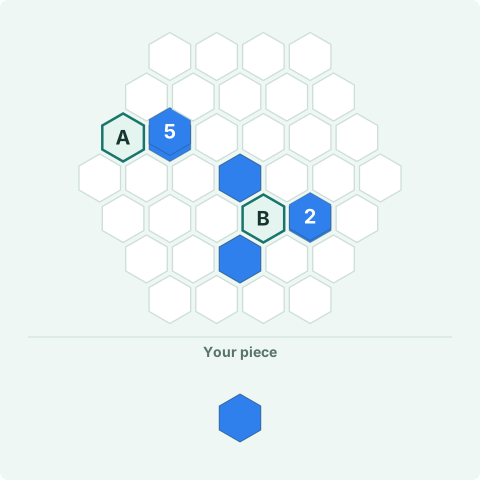
Which move leaves more open cells right now?
Your piece is one blue tile. A touches the blue 5. B is a shared empty neighbor of the blue 2 and two blue singles. Both moves fit. Compare the space left afterward, not just the Bloom count.
Place at A
Legal placement
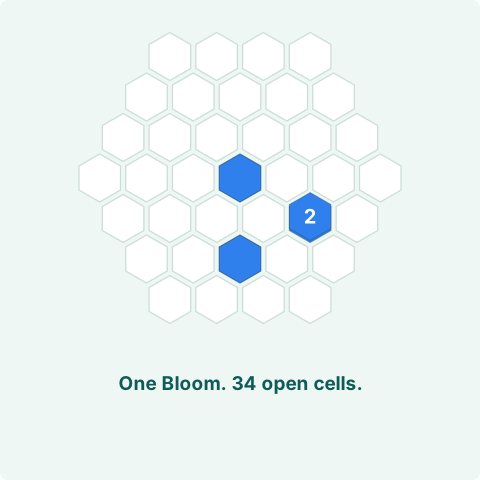
One Bloom, with 34 cells open.
The 5 and your single gather to 6 and Bloom. The other three stacks stay disconnected. This is a useful scoring move, and it opens one more cell than the starting board.
- Blooms
- 1
- Open cells
- 34 / 37
Place at B
Legal placement
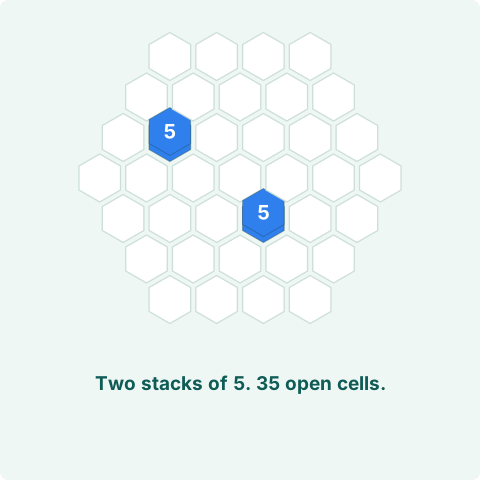
No Bloom, but 35 cells open.
The smaller stacks gather through B: 2 + 1 + 1 + 1 = 5. Three old cells empty, and the new 5 occupies one. The distant old 5 stays, leaving only two occupied cells. B wins this space question; A still gives the immediate Bloom. The better Classic move also depends on the rest of your tray.
- Blooms
- 0
- Open cells
- 35 / 37
More Blooms and more room are different goals. Compare the final board with the next piece you need to fit.
Protect room for your next shape →Take one idea into your next round.
Check the full shape, look at each color, or notice the space a gather opens. You do not need the biggest Bloom to make a useful move.
Play Hexzzle